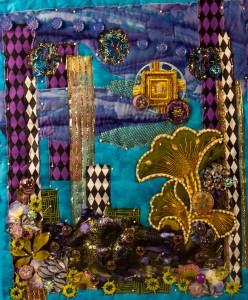
 After securing the major fabric motifs in place with pins, the fun part for me begins as I start to root through my stash of buttons and large beads. In this full shot of this 16″ x 20″ (40.5cm x 50.5cm) art quilt, there is a line of medium blue glass buttons going horizontally across the top purple blue clouds. I like to use lines of repeated design elements to help to tie the composition together. You’ll be able to see more of my button choices in the detail shots below.
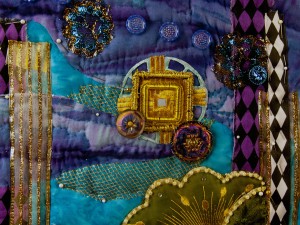 In this close-up shot of the sky, you can see how the medium blue glass buttons that I was talking about above accentuate the flow of the lines of the clouds. As I said in the first posting about this art quilt, I wanted to try not to cover up the beautiful lines of the purple blue clouds as they made the perfect cumulonimbus storm clouds that Dalton so loves. To the lower left and right of the central orb shaped portal, are two different kinds of the Czech glass buttons that I blogged about previously. Here. these two around the orb are backed with dichroic foil. I love how they change colors as I move the piece around as I’m sewing on it, or the light changes as the day progresses. In this shot, I still haven’t straightened the top of the black and white harlequin ribbon in the upper right of the photo. Sometimes, at this early stage, it’s hard to commit to just working with one style of button or bead as the ideas are coming rather fast at this stage. I get really anxious to try out a new idea regarding how a particlular color or bead would look, and I get easily side tracked.
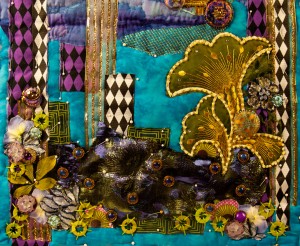 In this detail photo of the bottom of the art quilt, I’ve outlined the green lily with some large size 6 seed beads. I wanted to add a nubby edge to the outline of the flower. Since Dalton would not be playing in an ordinary garden, the shrubs around the edge of the blue and purple fabric in the bottom center are simulated by green rectangles with lime green lines. I’ve also employed some of my favorite design motifs of dyed shell circles, here colored in lime green. Instead of attaching them through the two small holes that are at opposite ends, I prefer to overcast them with 6-8 large stitches of embroidery floss to hold them in place. These shell circles come strung on plastic thread and can be bought in a number of different craft stores here in the States.
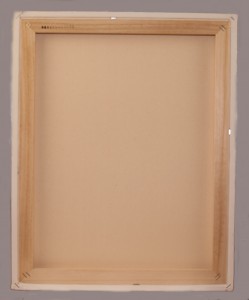 Pretty soon, at this stage of the construction process, the quilt sandwich will be cut away from the bottom piece of muslin. It was attached to the emboridery frame to make it easier to keep the sides squared. Once removed from the backing, the whole piece will be sewn onto a stretched piece of canvas 16″ (40.5 cm) x 20″ (51 cm). Doing that will make the whole piece much more stable and easier to fit the firm, stretched canvas into the final frame. (I don’t like to do too much sewing onto the canvas itself, as it’s too hard on my hands to sew thorugh the stiff canvas.) Here is the back of one of those canvases which shows the inner strip of wood that helps to stabilize the whole rectangle and to make the corners true 90 degree angles. The problem with doing this method however, is that it’s hard to sew around the inner strip of wood, which is about 1.5″ or 3.5 cm wide. I need to be careful before cutting the piece away from the backing fabric to make sure that I don’t bead too close to the edge of the piece. If I do, then the edges won’t fit easily under the overhang of the decorative frame. This time I may try to stitch the quilt sandwich down thesides to the canvas, as I ended up not being able to sew much anywhere near the outer edge of “Keith’s Garden“. The top outer edges of the embellished top, because of that innner extra strip of wood on the back, ended up being decoupaged lace motifs. They were too stiff, however, because of the lamnating liquid I used for the lace to easily sew through without really poking my fingers. (I hate to use thimbles.) Keep reading in future blogs as to how I solve that problem of treating the edges of these Meditation Gardens.
What construction problems in creating your own art forms have you encountered and how have you overcome them? I’d love to keep a running list of suggestions and post them every so often.
Why not leave a comment as to your thoughts on this posting. Please take a minute, fill out the form below or by clicking on the “comments/no comments link” at the top of the posting, and then share your ideas with the rest of us. We all grow when we share our thoughts and impressions, so why not join our growing community of those who appreciate art quilts and textile arts. We’d love to hear from you!
You can see more of my art work on my web site at www.fiberfantasies.com (be patient as it loads; it’s worth it) and can find me on Google + , Facebook, and Twitter.
To find out how to buy my art work, please check out “How to Buy my Art Work” in the “Pages” section to the right of this blog.

