Butterfly made from a bow costume pin
Butterflies have to be one of the happiest looking creatures on Earth as they bounce up and down as they fly. I am so looking forward to seeing them again, yet here in the Mid-Atlantic of the USA, just north of Washington, DC, we had light snow last night. So to brighten up the bleak forecast, and to distract me from the flowers that are already out that might freeze, I’m writing instead about how I use butterflies in my art quilts. After all, if it’s dreary outside, I can at least admire the colors in the photos of my creations.
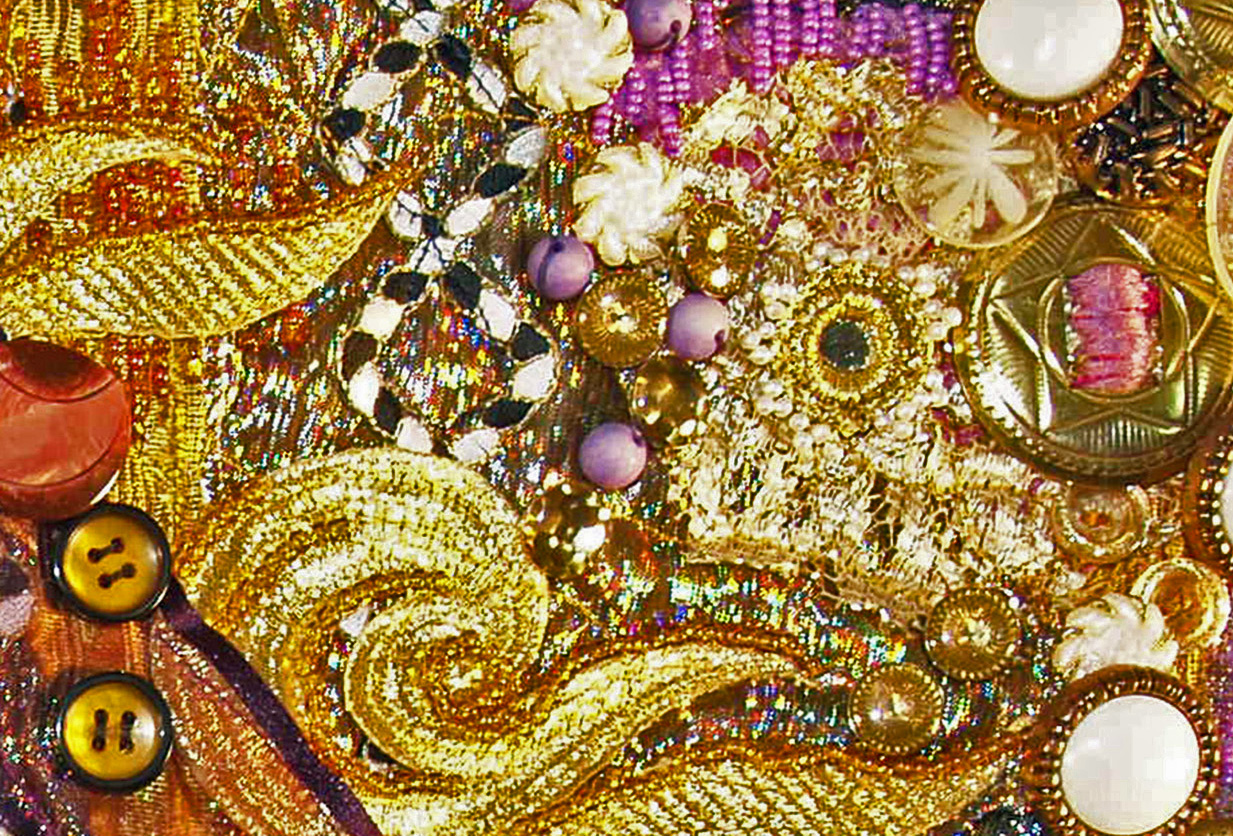
This first photo actually shows a costume pin bow.The ruffled edges and the pearls down the middle reminded me of a butterfly, so I added on a cone shaped, wire wrapped bead for the body, a flat wire wrapped bead for the head, and sewed on some seed beads for the antenna. It looks for all the world as if it was intended to be a real living insect.

Yellow enameled metal costume pin of a butterfly
Another butterfly pin from the same quilt has a more traditional enameled pin that you seeing coming out of China these days. The brightly colored pins are imported by a dealer, Faship, on eBay, and are quite inexpensive considering how much oomph they add. (He’s also about five miles from where I grew up in North Carolina in the Eastern United States). The graduated colors in the enamels and the quality rhinestones make the +/- $6 US worth the cost in my opinion because of the attention these pins create.

A costume pin of a butterfly in profile
The next costume pin of a butterfly is a little unusual in that it shows the insect in profile. Most pins want to get the most visual impact, so the 4 wings are usually shown flat. However, this perky little blue insect in the middle of this photo, again from this same art quilt, gives the viewer a bit of surprise as they come across it.
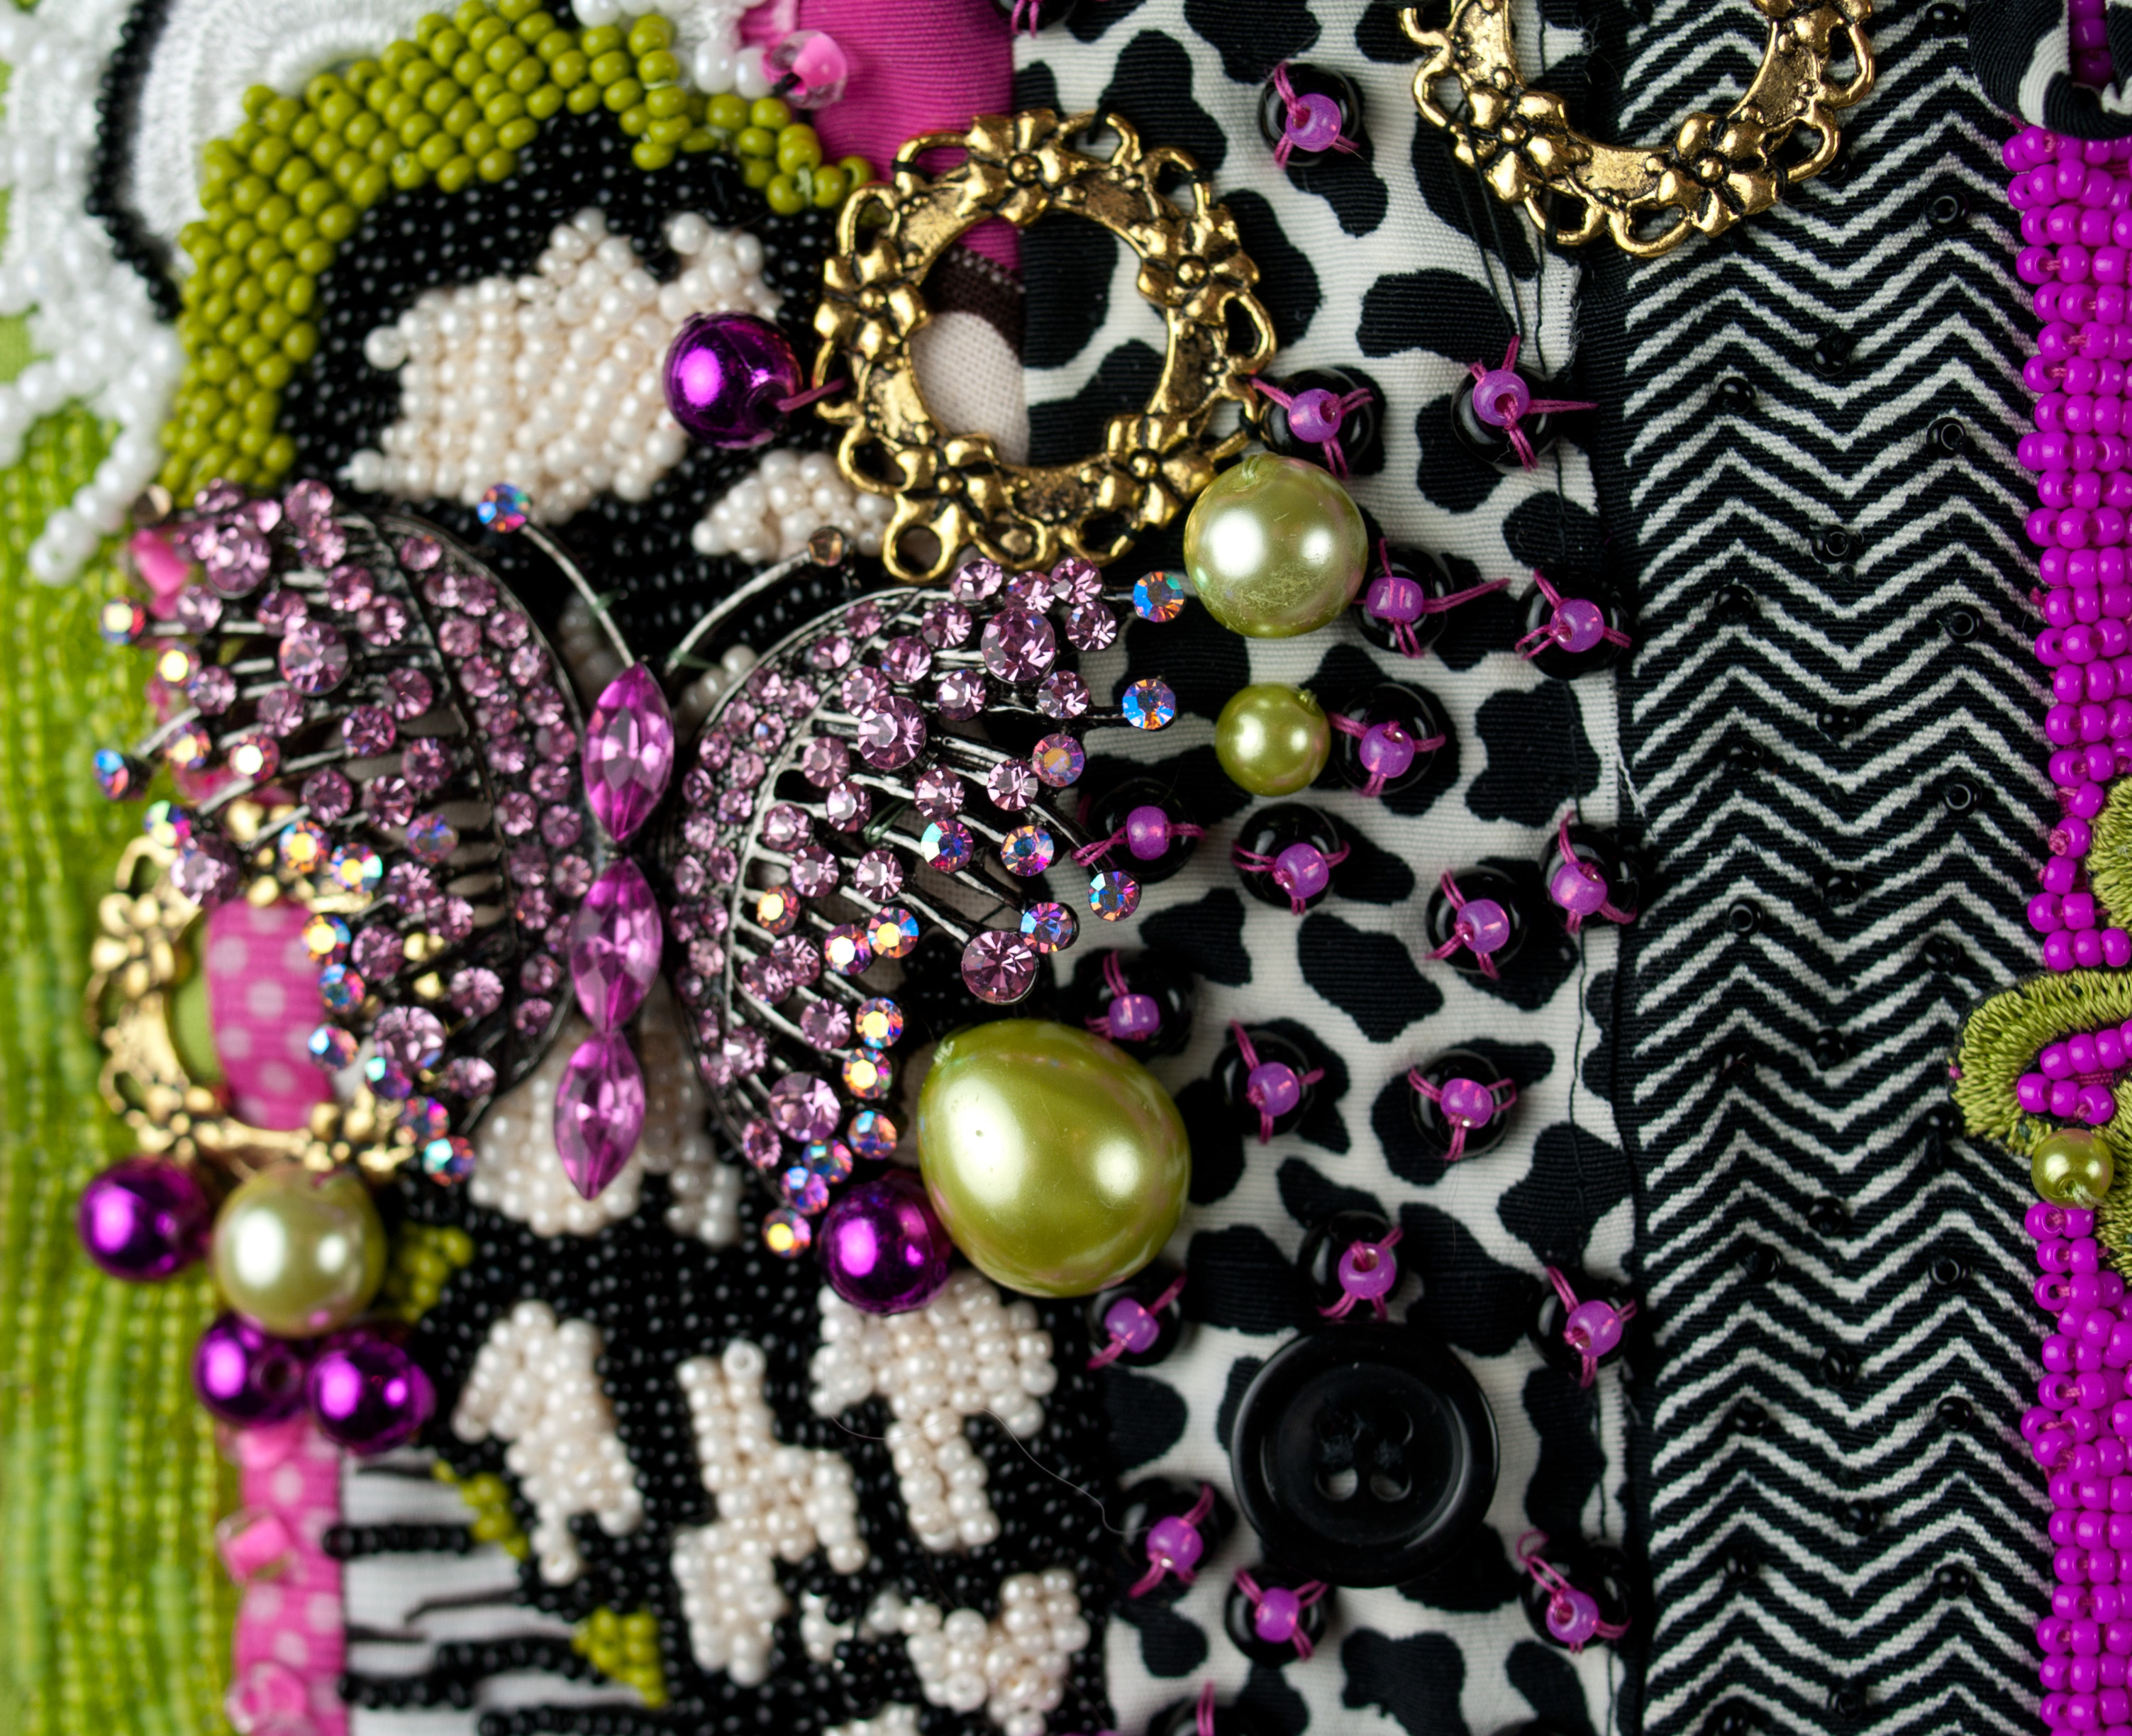
Pink rhinestone pin of a butterfly
Finally, there’s this elegant rhinestone covered butterfly pin. Each vein has LOTS of stones on it to catch and play with the light. It’s lacy appearance really adds some terrific visual appeal to the piece. However, its edges also remind me a bit of the torn wingtips I’ve seen of butterflies that have been attacked by hungry birds. I try not to think of that possibility as I look at this jewelry. Its see-through wings also remind me of the Glasswing Butterflies where you actually can see through the wings.
So, if you haven’t gathered by now, I adore butterflies, and since I do a lot of garden art quilts, I can easily work them into my compositions. I’d like to think that my work is interesting enough that you’d want to walk across the room to see the piece and as you got closer, and closer, you’d see more and more details. These butterfly pins certainly help to make that happen for my viewers.
Do you have a favorite creature that keeps appearing in your medium? Why did you happen to choose that particular being?
Why not leave a comment as to your thoughts on this posting. Please take a minute, fill out the form below or by clicking on the “comments/no comments link” at the top of the posting, and then share your ideas with the rest of us. We all grow when we share our thoughts and impressions, so why not join our growing community of those who appreciate art quilts and textile arts. We’d love to hear from you!… and PLEASE tell like minded souls about this blog! The more readers and contributors, the more I write because encouragement helps the words flow!
You can see more of my art work on my web site at www.fiberfantasies.com (be patient as it loads; it’s worth it), my spiritual healing work at www.transitionportals.com and can find me on Google + , Facebook (for Transition Portals) Facebook (for Fiber Fantasies), and Twitter.
To find out how to buy my art work, please check out “How to Buy my Art Work” in the “Pages” section to the right of this blog.